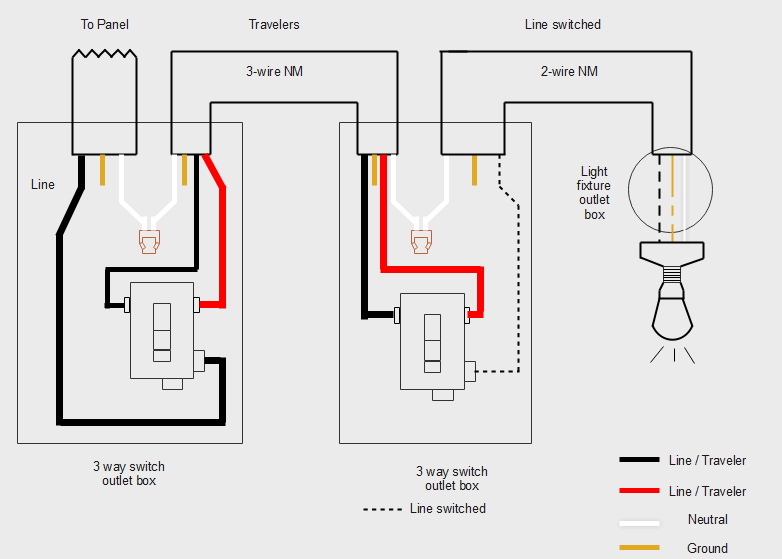
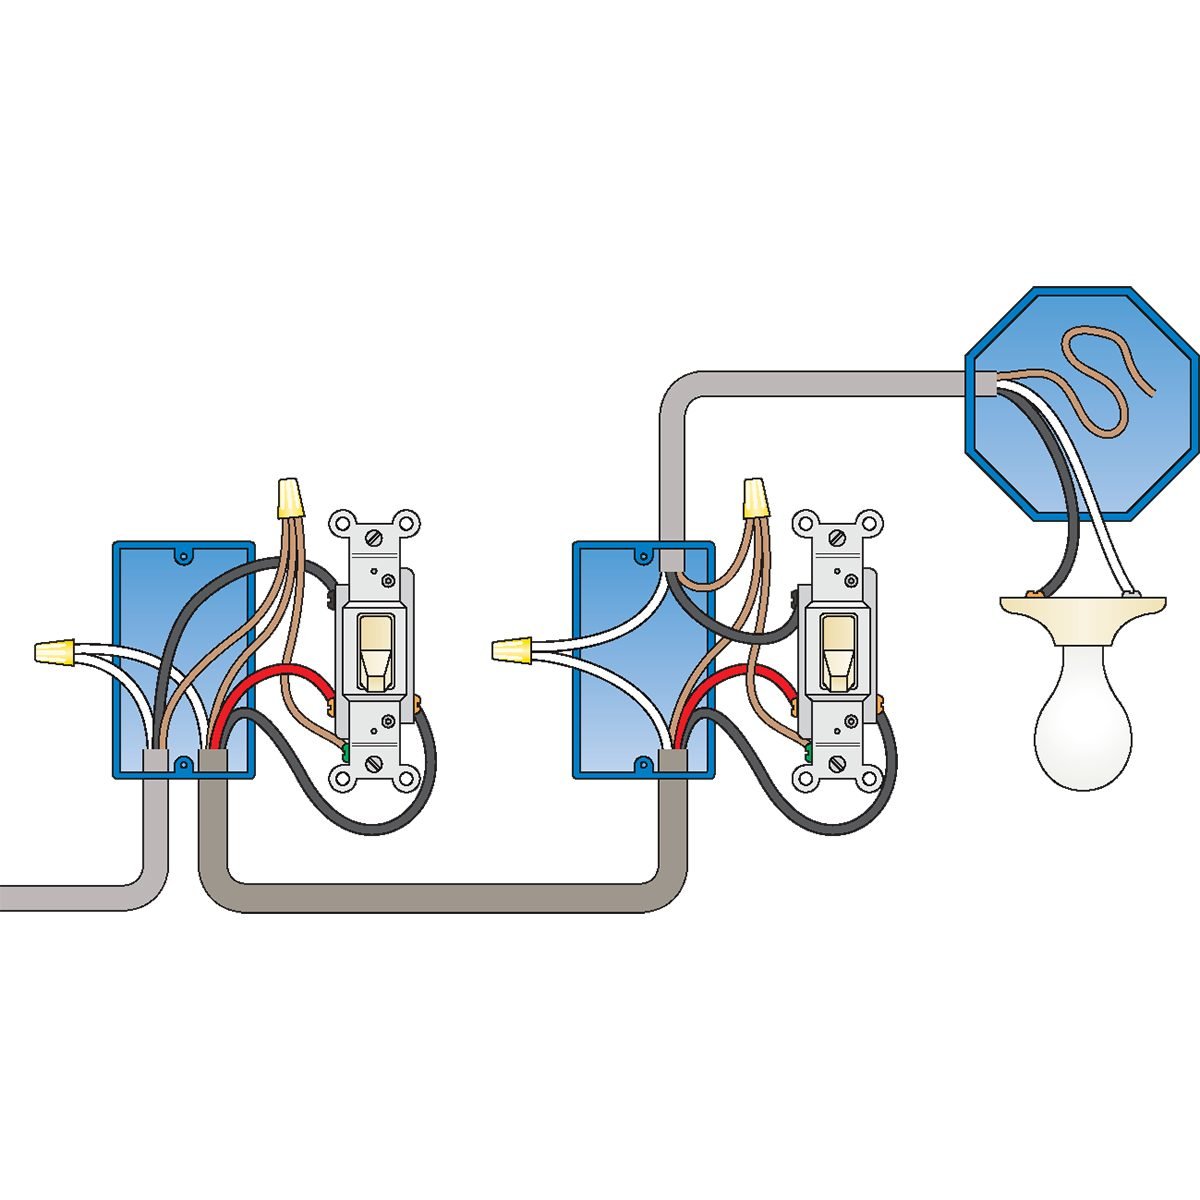
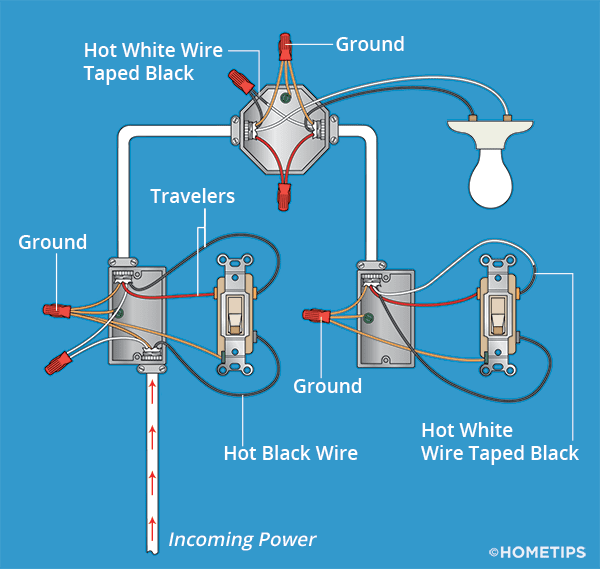
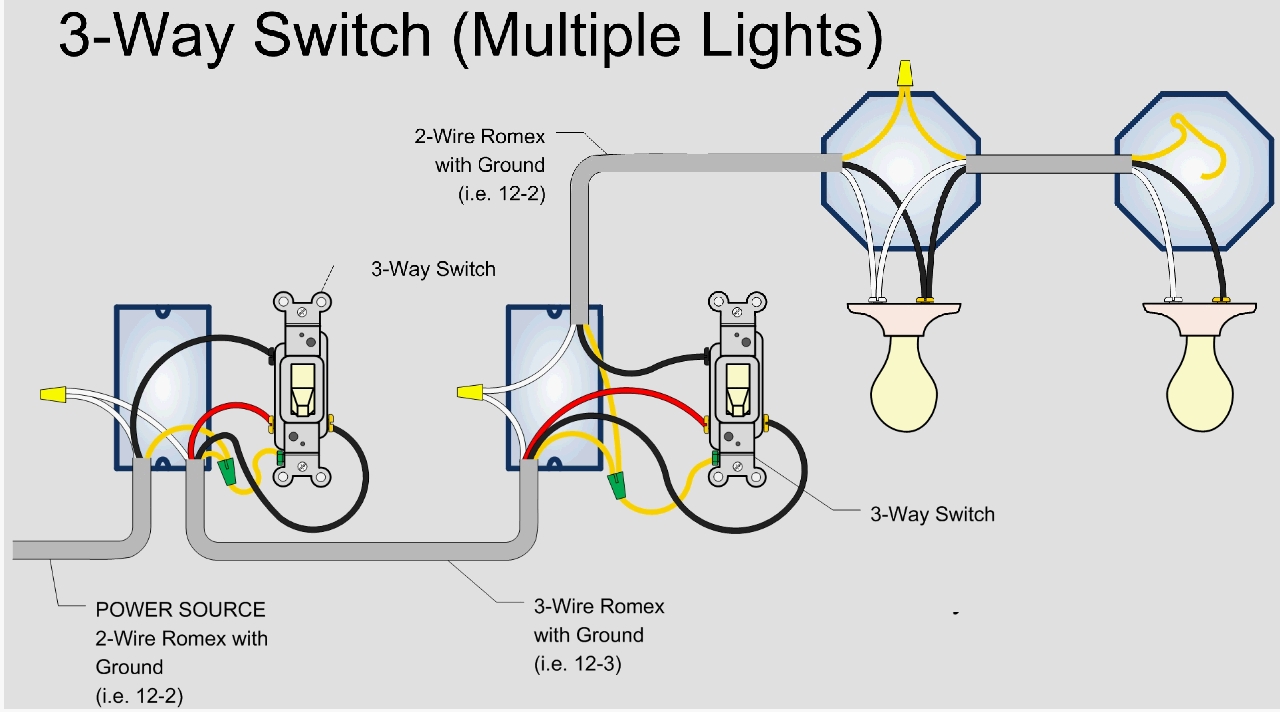
3 Way Switch Wiring Drawing
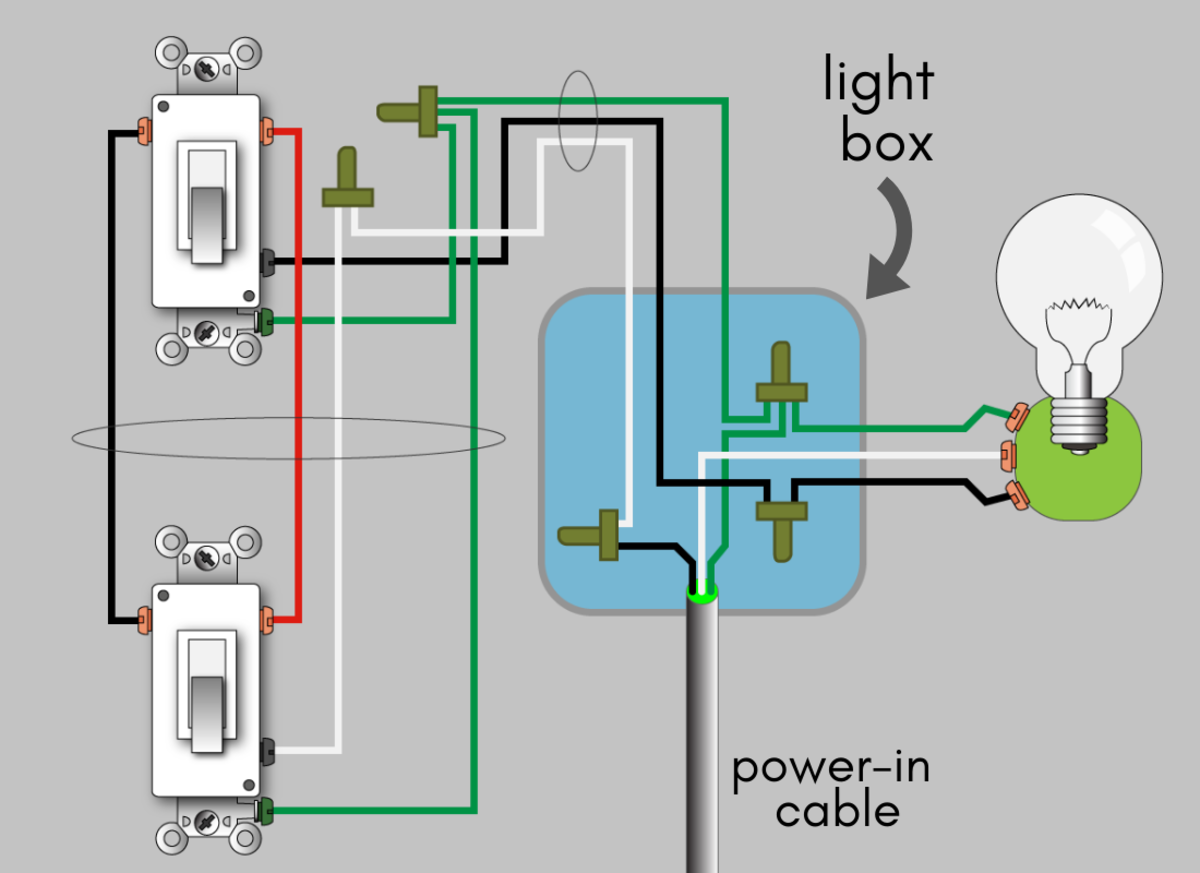
3 Way Switch Wiring Drawing - Flip off power in the room you're working. Light after switches (power at the switch). [2] head to your fuse box and make sure there is no power coming to the room you're currently working in. When the toggles from both switches are up or down, the circuit is complete and the light will be on. Web easy to understand fully illustrated and documented. Screw your two boxes and light fixture into place, then gather your supplies. Use a voltage detector to ensure that you're not going to shock yourself once you start working. Two traveler terminals and one common terminal. Connect live (or a hot wire) to the common (or black) terminal of the first switch. Same box having multiple switches; Web easy to understand fully illustrated and documented. Light after switches (power at the switch). The diagram will show how these various elements are connected to allow for the switch control from two separate locations. Connect live (or a hot wire) to the common (or black) terminal of the first switch. When the toggles from both switches are up or down, the circuit is complete and the light will be on. We’ll show several different wiring configurations. Same box having multiple switches; Opposite walls switch box having power from ceiling; Use a voltage detector to ensure that you're not going to shock yourself once you start working. Eight 3 way switches diagram variations. Allows you to control a light or other device from two different locations. The diagram will show how these various elements are connected to allow for the switch control from two separate locations. Flip off power in the room you're working. Web don’t be intimidated by the many colored wires, terminals, and screws. Basically, you need to feed in power. Same box having multiple switches; Web don’t be intimidated by the many colored wires, terminals, and screws. This wiring diagram shows both switches aligned together with the fixture at the end. Also included, are diagrams for 3 way dimmers, a 3 way ceiling fan, and an arrangement for a switched outlet from two locations. Basically, you need to feed in. Web on this page are several wiring diagrams that can be used to map 3 way lighting circuits depending on the location of the source in relation to the switches and lights. Web don’t be intimidated by the many colored wires, terminals, and screws. We’ll show several different wiring configurations. Also included, are diagrams for 3 way dimmers, a 3. Web don’t be intimidated by the many colored wires, terminals, and screws. Basically, you need to feed in power at the switch or at the light and set out one or multiple lights (2 lights, 3 lights, 4 lights or more) first, in the middle, or last in the configuration. Switch boxes on same wall & several light fixtures sharing. [2] head to your fuse box and make sure there is no power coming to the room you're currently working in. Eight 3 way switches diagram variations. Web on this page are several wiring diagrams that can be used to map 3 way lighting circuits depending on the location of the source in relation to the switches and lights. Opposite. When the toggles from both switches are up or down, the circuit is complete and the light will be on. Web don’t be intimidated by the many colored wires, terminals, and screws. Allows you to control a light or other device from two different locations. Basically, you need to feed in power at the switch or at the light and. Screw your two boxes and light fixture into place, then gather your supplies. Connect live (or a hot wire) to the common (or black) terminal of the first switch. Use a voltage detector to ensure that you're not going to shock yourself once you start working. Light after switches (power at the switch). 1st switch box nearby light fixture wiring; [2] head to your fuse box and make sure there is no power coming to the room you're currently working in. Opposite walls switch box having power from ceiling; Web ground or earth terminal. Also included, are diagrams for 3 way dimmers, a 3 way ceiling fan, and an arrangement for a switched outlet from two locations. Same box having. The diagram will show how these various elements are connected to allow for the switch control from two separate locations. Power source (usually a circuit breaker or fuse) light fixture or outlet. 1st switch box nearby light fixture wiring; Connect live (or a hot wire) to the common (or black) terminal of the first switch. Flip off power in the. Also included, are diagrams for 3 way dimmers, a 3 way ceiling fan, and an arrangement for a switched outlet from two locations. Web ground or earth terminal. Switch boxes on same wall & several light fixtures sharing breaker; The diagram will show how these various elements are connected to allow for the switch control from two separate locations. Flip. Flip off power in the room you're working. Web ground or earth terminal. Use a voltage detector to ensure that you're not going to shock yourself once you start working. This wiring diagram shows both switches aligned together with the fixture at the end. Same box having multiple switches; Opposite walls switch box having power from ceiling; When the toggles from both switches are up or down, the circuit is complete and the light will be on. Switch boxes on same wall & several light fixtures sharing breaker; Power source (usually a circuit breaker or fuse) light fixture or outlet. 1st switch box nearby light fixture wiring; We’ll show several different wiring configurations. Allows you to control a light or other device from two different locations. [2] head to your fuse box and make sure there is no power coming to the room you're currently working in. Web easy to understand fully illustrated and documented. Screw your two boxes and light fixture into place, then gather your supplies. The diagram will show how these various elements are connected to allow for the switch control from two separate locations.
3 way switch How to wire a light switch
3 Way Switch Wiring Diagram A Complete Tutorial EdrawMax

Wiring Diagram For 3 Way Switch To Light
How To Wire a 3Way Light Switch Family Handyman
3 Way Switch Wiring Diagram Power At Light
Wiring Of A Three Way Switch

Standard 3 Way Switch Wiring Diagram Diysus
How to Wire a 3Way Switch Wiring Diagram Dengarden

Wiring A 3way Switch Diagram
![[Proper] 3 Way Switch Wiring and Connection Diagram ETechnoG](https://1.bp.blogspot.com/-H_oNBfwZ_tM/XO7F94xoHCI/AAAAAAAAB8I/nLh7DyWH5ac2oahDDj_0wApr_pvBb7jkgCLcBGAs/s1600/3%2Bway%2Bswitch%2Bwiring%2Bconnection.png)
[Proper] 3 Way Switch Wiring and Connection Diagram ETechnoG
Also Included, Are Diagrams For 3 Way Dimmers, A 3 Way Ceiling Fan, And An Arrangement For A Switched Outlet From Two Locations.
Connect Live (Or A Hot Wire) To The Common (Or Black) Terminal Of The First Switch.
Two Traveler Terminals And One Common Terminal.
Light After Switches (Power At The Switch).
Related Post: